
A steel bolted tank can look simple from a distance. Trucks arrive, panels go up, and the footprint changes fast. Yet the result depends on choices made weeks earlier.
This guide explains the steel bolted tank installation process in clear stages. You will see what happens before delivery, how crews build the shell, and how testing confirms readiness. Use it to plan schedules, reduce rework, and keep handovers smooth.
Owners often want a quick roadmap before they dive into details. The table below summarises the main phases, typical timing, and what to verify at each stage.
| Phase | What happens | Typical time range | What you should verify |
| Planning | Capacity, stored product, coatings, codes, and site constraints | 2–8 weeks | Code path, access plan, containment needs, scope clarity |
| Foundation | Subgrade prep, concrete ring wall or slab, anchors, sleeves | 1–3 weeks | Level tolerance, dimensions, cure time, utilities marked |
| Erection | Panel staging, roof build, jacking, ring-by-ring shell assembly | 1–4 weeks | Torque control, gasket alignment, plumb, and roundness checks |
| Testing | Nozzles and accessories, seal checks, hydro test, and inspections | 2–10 days | Leak checks, inspection sign-offs, and test records |
| Handover | O&M package, training, and early inspection plan | 1–3 days | As-builts, warranty paperwork, safety access guidance |
If you want a practical view of typical configurations and project workflows, many owners start with the Tarsco website during early planning.
Before Anything Arrives: Design, Permits, and Site Planning
Installation starts in engineering, not in the field. The team defines capacity and stored product first. That can mean water, wastewater, chemicals, or dry bulk, plus operating temperature and duty cycle. Engineers then match coatings or liners to the service and confirm roof type, vents, nozzles, and access hardware.
Codes and site constraints shape the final design. AWWA often applies to steel water storage tanks, while NFPA may apply to fire protection storage. Local building rules can drive wind, seismic, and inspection requirements. Engineers also review soil reports, confirm truck access, and check secondary containment needs or safety distances.
Pre-install items to lock down early:
- Stored product, duty cycle, and temperature range
- Coating or liner system and required fittings
- Code path and any third-party inspection needs
- Site access, loads, and containment requirements
Planning time varies by scope and permitting speed. Some projects move in a few weeks, while others take longer due to approvals or specialised coatings. Many sites do require permits or environmental review, depending on location and stored product.
Step 1 On Site: Groundworks and Tank Foundation
A bolted tank needs a stable, level base for sealing and long-term shell performance. The foundation supports the tank evenly and protects gaskets and joints. This is why bolted tank foundation requirements matter for reliability and warranty compliance.
Most foundations use a reinforced concrete ring wall or a full slab. Crews prepare compacted subgrade, install anchors, and set embedded sleeves for piping. Those sleeves prevent last-minute drilling that can compromise fit and sealing.
Before steel arrives, crews verify:
- Foundation dimensions and anchor locations
- Level tolerance across the bearing surface
- Concrete cure time and strength checks
- Marked underground utilities and clear access routes
Foundation work often takes one to three weeks. Weather, soil conditions, and cure time can extend that range. If the base is not level, panels can see uneven stress, which increases leak risk. Fixing level issues early is faster than correcting them during erection.
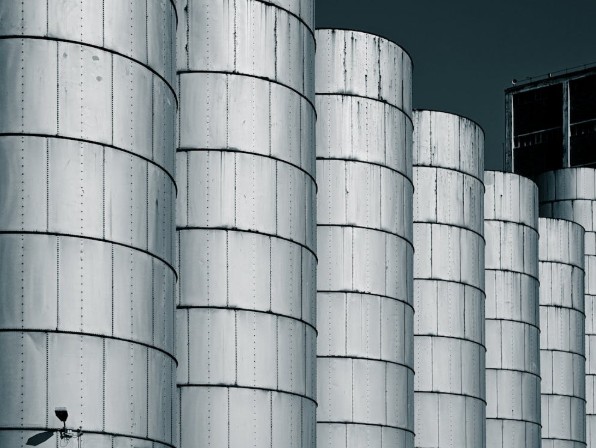
Step 2: Delivery, Panel Layout, and Building the Tank Shell and Roof
When the kit arrives, the crew starts with inventory control. They unload trucks, verify parts against packing lists, and stage panels, gaskets, bolts, and sealants near the foundation. Good staging reduces handling and keeps torque work consistent.
Many projects use a top-down jacking method as part of the bolted tank erection process. Crews assemble the roof and the top shell ring at ground level. They then set the jacking system, lift the structure, and add lower rings course by course until the shell reaches full height.
Quality checks run through every lift. Crews align gaskets, apply sealant where specified, and torque bolts to defined values. They also check plumb and roundness at intervals as the shell grows. This is core to step-by-step bolted tank installation and helps prevent alignment drift.
Owners often ask how much heavy equipment is needed. Smaller tanks may rely on forklifts and a telehandler. Larger tanks may use a crane for staging and initial lifts. Jacking reduces the need for constant large crane work during assembly.
The weather can still affect the schedule and safety. High winds can pause lifts, and rain can slow sealing and safe access. Strong teams sequence tasks to use calm, dry windows for sensitive steps.
Step 3: Nozzles, Internals, and Leak Testing Before First Fill
After the shell and roof are complete, crews install working components. This can include nozzles, manways, ladders, platforms, level gauges, mixers, and internal piping. The team seals each penetration and confirms gasket seating at every interface, since fittings often drive many leak issues.
If the design includes a liner system, crews inspect it before testing. They check seams, terminations, and penetrations, then confirm details match the drawings. Next comes testing, often through a hydrostatic fill test or staged fills to specified levels. Crews inspect seams, joints, and fittings during and after the test.
Some projects also require third-party or code-driven inspections. The inspection scope depends on the stored product and local requirements. Industrial water storage tank installation often includes documented test results to support commissioning.
Owners can confirm readiness through documented outcomes. You should receive test records, inspection sign-offs, and as-built drawings that reflect the final build. You should also receive an operations and maintenance manual that matches the installed fittings and access features.
Handover, Early Maintenance, and Working With Experienced Installers
Handover should be structured, not casual. The installer walks the site with the owner’s team and reviews safe access, valves, vents, and control points. They also cover lockout and tagout practices where equipment ties into pumps, mixers, or controls.
Early care sets the pattern for decades of service. Use this simple early-maintenance checklist after initial fill and during the first year:
- Inspect exterior surfaces after the first week of operation
- Walk the perimeter after the first month and look for seepage marks
- Follow any installer guidance on bolt re-torque timing
- Verify platforms, ladders, and guards remain secure and aligned
- Set an annual inspection schedule and keep photos in a log
Many owners rely on specialist bolted steel tank installers who handle engineering support, fabrication, and field erection. Crews who follow defined torque specs and consistent erection methods can reduce avoidable leaks and alignment issues. With the right sequence, a steel bolted tank can go online quickly and deliver decades of reliable service.
Write and Win: Participate in Creative writing Contest & International Essay Contest and win fabulous prizes.


