Introduction
Laser engraving is an exciting and versatile craft that lets you personalize and create stunning designs on a variety of materials. Whether you’re a complete beginner or someone just starting out with laser engraving, the possibilities are endless. With the right machine and a little practice, you can create unique items that are both functional and beautiful. In this blog, we’ll explore 8 beginner-friendly laser engraving projects that are fun to create, easy to master, and perfect for getting you started on your engraving journey.
1. Personalized Wooden Coasters
Why It’s Beginner-Friendly: Wooden coasters are small, simple, and the perfect surface for your first engravings. You can easily create personalized designs without complicated shapes or large-scale projects.
Materials Needed:
- Plywood or bamboo coasters
- Laser engraver (like the OMTech Laser)
- Design files (custom names, logos, or quotes)
Step-by-Step:
- Choose your coasters. Bamboo and plywood are ideal materials for beginners due to their smooth surfaces and easy engraving.
- Create a simple design. Try engraving initials, short quotes, or geometric patterns to start.
- Set up your machine, adjust the settings for the material, and start engraving.
- Once done, you’ll have personalized coasters that make great gifts or home decor!
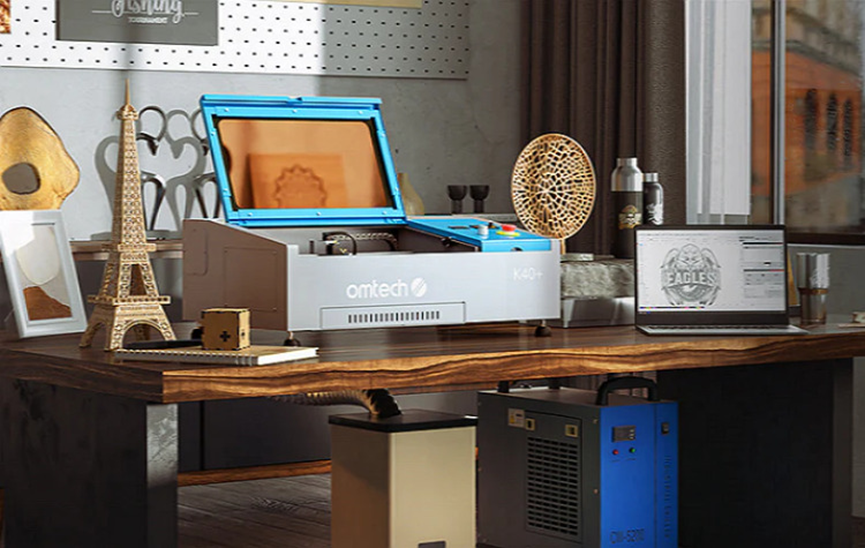
For beginners, the key is to start with simple, approachable projects. A great entry-level machine like the OMTech laser engraver offers precision, ease of use, and versatility, making it an ideal choice for anyone new to the craft.
2. Custom Keychains
Why It’s Beginner-Friendly: Keychains are small, affordable, and easy to work with. They also offer plenty of room for creativity without being overwhelming.
Materials Needed:
- Acrylic or wood keychains
- Laser engraver
- Design files (text, patterns, logos)
Step-by-Step:
- Pick your keychain blanks—acrylic and wood are both popular and easy to engrave.
- Choose a simple design—names, initials, or fun icons work well.
- Load the design into your engraver software, set the engraving parameters, and position your keychain.
- Start engraving, and after a few minutes, you’ll have a custom keychain ready to use.
This is a great way to practice engraving on smaller objects while creating useful, personalized accessories.
3. Engraved Drinkware (Mugs or Tumblers)
Why It’s Beginner-Friendly: Drinkware, like mugs and tumblers, provides a smooth and clean surface for laser engraving. Plus, they’re practical items that make great gifts!
Materials Needed:
- Ceramic mugs or stainless steel tumblers
- Laser engraver
- Design files (quotes, names, logos)
Step-by-Step:
- Select your drinkware. Stainless steel and ceramic work well with laser engraving machines.
- Design something simple—names, logos, or short sayings are all great options.
- If your engraver has a rotary attachment, set it up to hold the drinkware securely.
- Position your design, adjust the settings, and start engraving.
- After engraving, you’ll have a personalized mug or tumbler, perfect for gifts or personal use.
These projects are quick, easy, and high-quality, perfect for beginners to experiment with different designs.
4. Engraved Wooden Signs
Why It’s Beginner-Friendly: Wooden signs are an excellent choice for beginners because they’re relatively large, giving you more room for your designs, and the engraving process is simple to control.
Materials Needed:
- Softwood (pine or birch works well)
- Laser engraver
- Design files (family names, inspirational quotes, address plaques)
Step-by-Step:
- Choose your wood—softwoods like pine are affordable and easy to engrave.
- Pick a simple design. Start with text, like your family name or a favorite quote.
- Adjust the engraving settings for the type of wood you’re using.
- Place the wood on the bed, ensuring it’s centered and secure, and start the engraving process.
- Once the engraving is complete, you can add a finish or frame to your sign.
Wooden signs make a great addition to your home decor and offer plenty of opportunities for creativity.
5. Custom Phone Cases
Why It’s Beginner-Friendly: Phone cases are trendy and easy to personalize, making them perfect for beginner engravers. They’re small, easy to handle, and great for experimenting with simple designs.
Materials Needed:
- Wooden or acrylic phone cases
- Laser engraver
- Design files (monograms, patterns, or logos)
Step-by-Step:
- Choose a phone case, preferably made of wood or acrylic for easier engraving.
- Design a pattern or monogram to engrave onto the case.
- Position the phone case on the engraver bed, adjust settings, and ensure it’s aligned properly.
- Start engraving and watch as your custom design comes to life on the case.
Custom phone cases are a popular product that’s simple to create and always in demand.
6. Personalized Leather Wallets
Why It’s Beginner-Friendly: Leather offers a premium feel and engraves well with laser technology. Personalizing wallets is a great way to add a unique touch to everyday items.
Materials Needed:
- Leather wallet or accessory
- Laser engraver
- Design files (initials, monograms, or logos)
Step-by-Step:
- Select a leather wallet or small accessory to engrave.
- Choose a design—try engraving initials or a small logo for a clean, personalized look.
- Position the wallet carefully in the engraving bed.
- Adjust your settings for leather engraving (lower power, higher speed).
- After engraving, you’ll have a stylish, personalized wallet that’s perfect for gifting.
Leather projects are perfect for practicing engraving on delicate, premium materials.
7. Custom Stamps
Why It’s Beginner-Friendly: Stamps are a simple and practical project that allows beginners to create custom items quickly. They’re perfect for personal use or for businesses needing a branded stamp.
Materials Needed:
- Rubber or silicone stamp material
- Laser engraver
- Stamp handle
Step-by-Step:
- Design your stamp, such as a logo, signature, or small image.
- Place the rubber or silicone material into the engraver and set the settings.
- Begin engraving your design, then cut out the stamp.
- Attach the stamp to a handle and you’re ready to use it!
Custom stamps are great for creating business tools, stationery, or just fun designs for personal use.
8. Personalized Picture Frames
Why It’s Beginner-Friendly: Picture frames are an ideal project for beginners because they offer a smooth surface for engraving, and you can create beautiful, custom designs with ease.
Materials Needed:
- Wooden or acrylic picture frames
- Laser engraver
- Design files (names, dates, or decorative borders)
Step-by-Step:
- Choose a frame made of wood or acrylic.
- Create a simple design—consider adding names, dates, or decorative borders.
- Place the frame on the engraving bed and adjust the settings for your material.
- Start engraving and, once done, insert your favorite photo.
Engraved picture frames make wonderful gifts, and they’re easy to customize for any occasion.
Conclusion
Laser engraving is a fun and accessible craft that anyone can try, and these 8 beginner projects are the perfect way to get started. Whether you’re creating personalized home decor, functional items, or small gifts, the possibilities are endless. Starting with simple designs will help you master your machine and boost your confidence as you move on to more complex projects. With an OMTech laser engraver, you can start creating personalized, high-quality items in no time. So, grab your engraver, choose your first project, and start turning your creative ideas into reality!
Write and Win: Participate in Creative writing Contest & International Essay Contest and win fabulous prizes.